Spoiler Warning: Spoilers are present for each of the episodes on the list below.
Happy Halloween!
To celebrate the spookiest day of the year, I thought it could be a bit of fun to choose five Star Trek episodes that have a “horror” theme or vibe. The Star Trek franchise has dabbled in many genres across its fifty-seven-year history, and there are a handful of episodes that definitely have horror overtones. Though the Star Trek franchise is never quite on par with a dedicated horror film or TV show, there are still some decidedly creepy, spooky, or downright frightening stories – as well as scenes and sequences across many more episodes.
This time, I’ve pulled out five episodes that I think could make for entertaining Halloween viewing! The episodes come from five different shows across Star Trek’s history, and while they’re all very different, the overall trend here is one of horror. So if (like me) you’re a bit of a scaredy-cat… maybe you shouldn’t watch them!
Are you ready to cower in fear?
As always, a couple of caveats. This list is just for fun, and I share it in a light-hearted manner. I’m not saying that these episodes are somehow “objectively” the best horror-themed stories in the history of Star Trek – nor even that all of them are among the best that the franchise has to offer. This is all just the opinion of one Star Trek fan, shared in the spirit of Halloween.
I don’t have any other major rules or criteria for this list – other than the episodes had to be horror-themed, spooky, or frightening! I wouldn’t say any of them are the scariest things I’ve ever seen; this is still Star Trek, after all! But echoes of the horror genre are present throughout.
With all of that out of the way, let’s jump into the list!
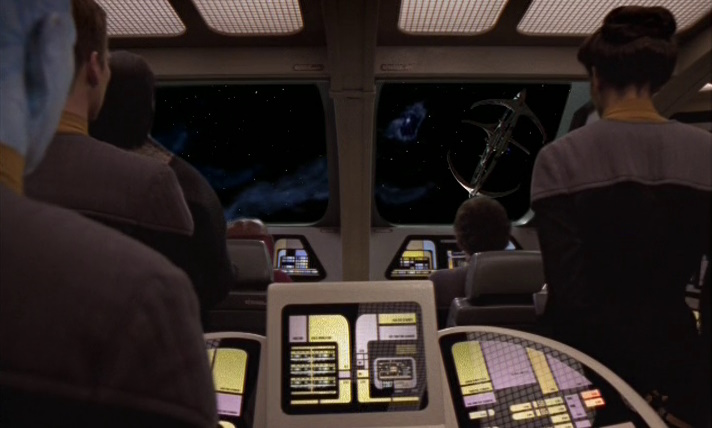
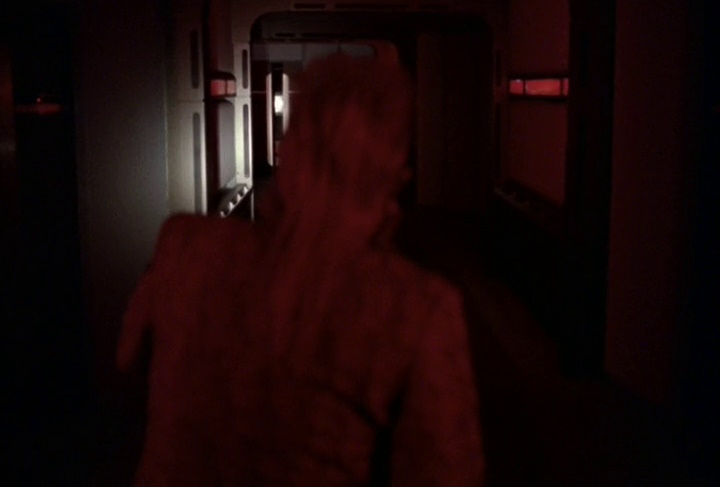
Episode #1: Empok Nor Deep Space Nine Season 5
Approaching Empok Nor in a Runabout.
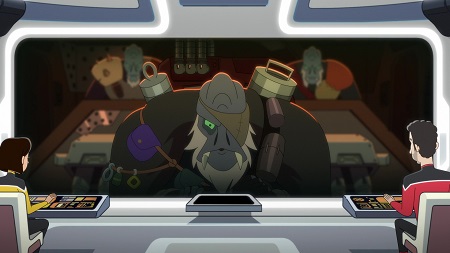
I adore DS9′s fifth season. It has so many incredibly strong episodes, and Empok Nor is definitely one of them. There’s a genuine fear factor to the presentation of Garak – a character who has already been established, by this point in the series’ run, as being mysterious and even dangerous. Seeing him go “rogue,” and using some of his skills from his time in the Obsidian Order against our Starfleet heroes is truly disturbing.
The interplay between Garak and O’Brien, conducted largely by communicator once the episode gets going, is also fantastic! It reminds me in more ways than one of the film Die Hard, but with a decidedly darker edge. The board game analogy that Garak repeatedly brings up also adds to the unsettling presentation of his character, showcasing his descent into “madness.”
Garak.
For a Star Trek episode, Empok Nor is also surprisingly violent, with the deaths of several redshirts (or the aftermaths, at least) being shown in graphic detail. There wasn’t much blood or viscera shown – this was pre-watershed television in the ’90s, after all – but when compared with what other Star Trek stories were doing around the same time, the death and mutilation shown in Empok Nor is positively graphic!
The episode manages to ramp up the tension and fear as it progresses, and uses the familiar Deep Space Nine sets and stages in a unique way. Changes in lighting coupled with a distinct lack of DS9′s regular background characters populating the station creates a truly creepy backdrop that heightens the episode’s frightening elements. It has wonderful performances from Andrew Robinson, Colm Meaney, and the late great Aron Eisenberg in particular. All in all, an outstanding start to our list!
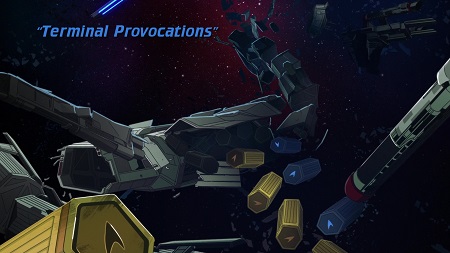
Episode #2: Terminal Provocations Lower Decks Season 1
Creating an AI? What could possibly go wrong?
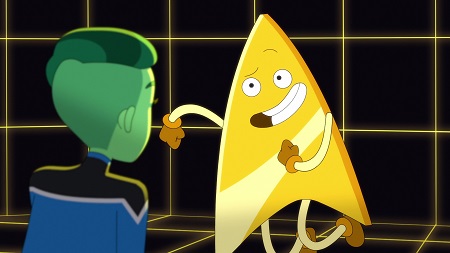
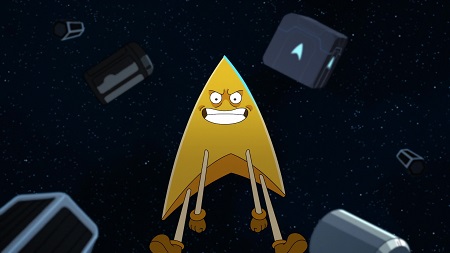
This episode, from Lower Decks’ first season, is on the list for one reason: Badgey! Badgey is a truly disturbing villain, and a reflection of contemporary fears of artificial intelligence gone wrong. An unsettling combination of Microsoft Office’s “Clippy” and renegade AI villains like the Terminator, Badgey really succeeds at unnerving me!
The other side of Terminal Provocations sees Boimler and Mariner team up with a friend of theirs to try to undo a mistake – a mistake that soon evolves into another monster to defeat. This computer-core monster is less frightening than Badgey, but it’s still worth noting that it has a couple of creepy moments of its own.
Here’s Badgey!
“Trapped on the holodeck” is a Star Trek trope going back to the introduction of the setting in The Next Generation, and there have been several episodes that have managed to evoke a sense of danger from that premise. But Terminal Provocations is arguably the first where this concept has been spun out to be something truly frightening, and the first to use the “broken holodeck” idea to lean into a horror story.
As Badgey pursues Rutherford and Tendi across a variety of environments, we get to see the villainous construct in several different – and increasingly dangerous – situations. The tension on this side of the story builds to a surprisingly emotional climax – one that seems to be in the vein of the likes of Frankenstein. Click or tap here to see my review of the episode, written shortly after its original broadcast in 2020.
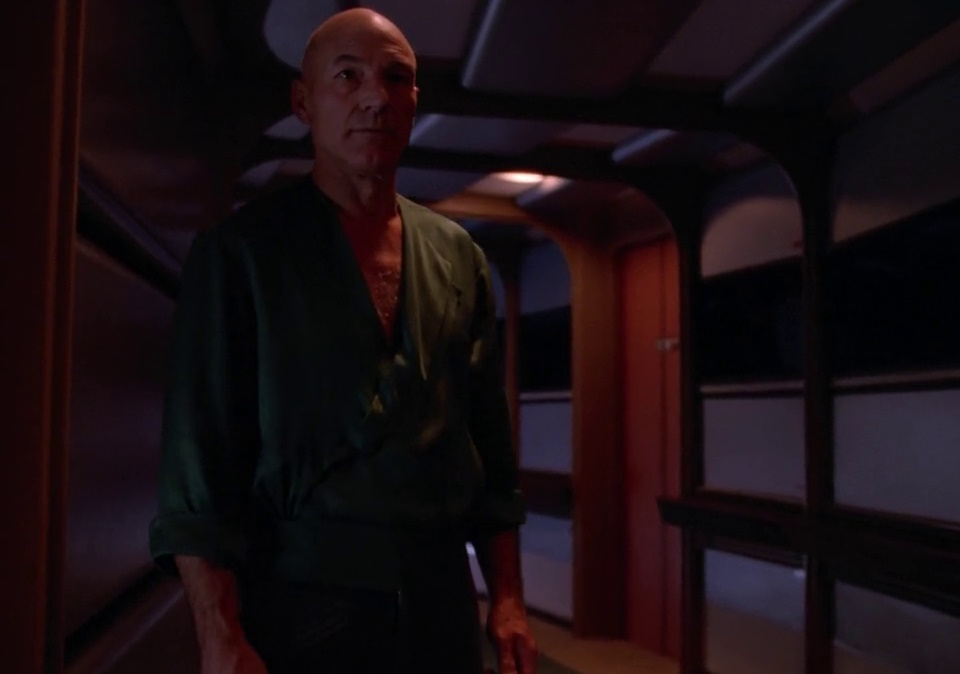
Episode #3: Starship Mine The Next Generation Season 6
The Enterprise-D undergoing a baryon sweep.
Less out-and-out terrifying than creepy and unsettling, Starship Mine sees Picard trapped aboard a deserted Enterprise-D – while a gang of wannabe terrorists try to steal a dangerous explosive material. As above with Empok Nor, seeing the usually-populated ship abandoned and deluminated is enough to set the stage in a most unnerving way.
The baryon sweep which begins to slowly work its way through the Enterprise-D is a frightening concept, too, and the stakes involved are communicated well. By the time Picard is face-to-face with the deadly phenomenon, we’ve already seen first-hand what it can do to people, and we can see just how deadly it is. Knowing the layout of the Enterprise-D, with Ten-Forward being the forwardmost part of the ship, is a good bit of information to have, too, as it really hammers home that Picard and the villainous Kelsey have literally nowhere left to run.
Picard is trapped aboard the Enterprise-D.
Playing a game of cat-and-mouse with hostile terrorists aboard the Enterprise-D is surprisingly fun, and Starship Mine put Picard at the centre of the action – which is a narrative space he didn’t always get to occupy. Picard is a very different kind of captain than Kirk had been, so to see him in this kind of spy/action hero role is something different, too.
I also felt that Picard’s actions at the climax of the episode show a ruthlessness that we seldom get to see; a dark, cunning, and utterly cold presentation of the character that’s disturbing in its own right. Maybe Starship Mine isn’t the scariest episode in the franchise – but it’s unsettling in its own way.
Episode #4: All Those Who Wander Strange New Worlds Season 1
A gory scene…
Across a truly spectacular first season, Strange New Worlds dipped its toes in a variety of different genres. All Those Who Wander is the show’s take on horror – and it absolutely nailed it. All Those Who Wander might be the out-and-out scariest episode on this list – and perhaps even the most overtly frightening that the Star Trek franchise has ever attempted.
The DNA of films like Predator and Alien is present throughout, and All Those Who Wander takes a familiar setting, characters, and even an alien race that we thought we knew and catapults them into a desperate fight for survival against an adversary who feels every inch the predator.
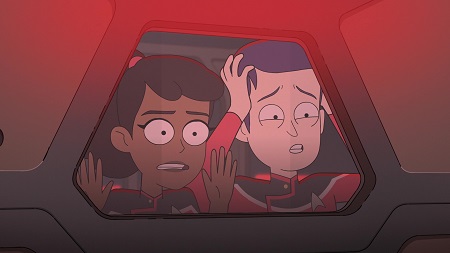
La’an and the away team prepare to do battle.
Setting the story aboard a crashed starship on a desolate, icebound planet was a masterstroke, and the hallways of the USS Peregrine feel incredibly claustrophobic as the away team is quite literally being hunted by an apex predator. The Gorn feel like a perfect fit for this role, too, and both the episode and Strange New Worlds as a whole manage to expand our knowledge of the race without treading on the toes of established canon too much. Gorn eggs being parasitic was a particularly masterful stroke of writing – one that loaded the story of All Those Who Wander for a last-second detonation.
There have to be stakes in horror; as the audience, we need to feel that our characters are genuinely in danger, not safe from all turmoil and threats thanks to heavy plot armour. Part of that means that killing off major, named characters – not just nameless redshirts – has to be on the table. And throughout All Those Who Wander, our heroes genuinely seem to be in danger.
Episode #5: The Haunting of Deck Twelve Voyager Season 6
Who’s ready for a ghost story?
We’ve already talked about this episode here on the website – I covered it in-depth for Halloween a couple of years ago. But it’s such a unique and fun spooky story that I think it’s worth including on a list like this one! Click or tap here, by the way, if you’re interested in a more in-depth look at the episode and its spookiness.
What I love about The Haunting of Deck Twelve is its “ghost stories around the campfire” framework. Neelix, a character so often used as comic relief, makes for such an interesting narrator – and there’s a sense, as the episode progresses, that we can’t entirely rely on his recollection of the events. This just adds to the tension, for me, and makes the frame narrative work so incredibly well.
Neelix investigates…
Halloween is a holiday for the little ones, despite its horror theme and frightening elements. And The Haunting of Deck Twelve brings Voyager’s full complement of Borg kids into the story in a relatable and understandable way. The way the frame narrative and flashbacks come together is great, and the episode is stronger than it would have been without Neelix and the kids to set the stage.
There are several jumpscares in this episode, as the USS Voyager encounters a brand-new form of life and begins to suffer malfunctions. Seen through the eyes of the kids listening to Neelix’s tale, these moments are elevated. At points, it genuinely feels like we’re right there around the “campfire” with Neelix and the Borg children.
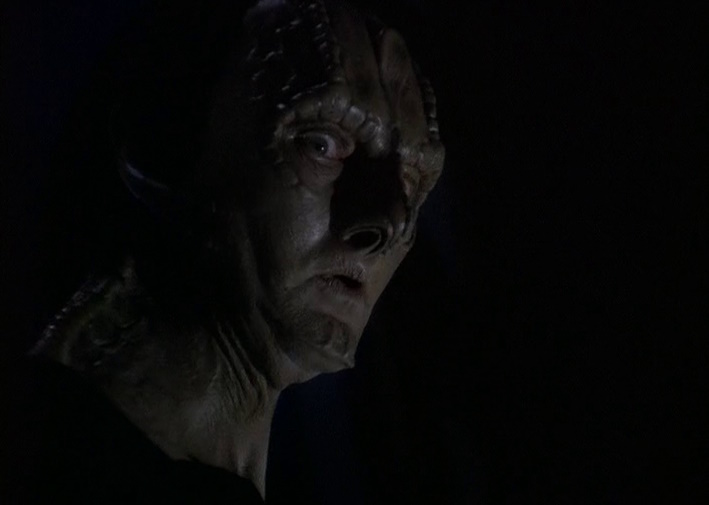
So that’s it!
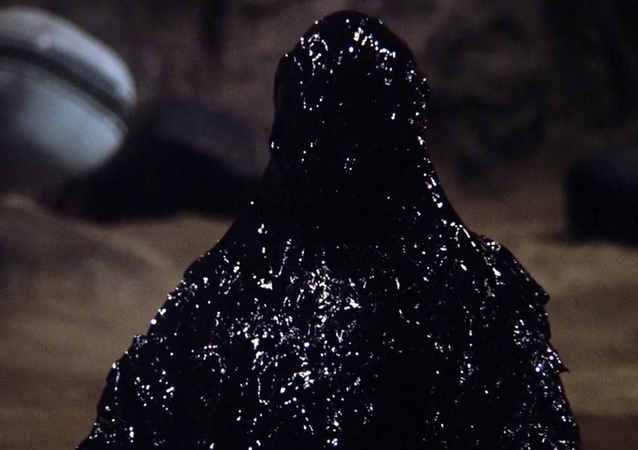
Armus.
I hope this was a bit of fun. There are other examples of the Star Trek franchise trying out a scary or horror-inspired story, but these are five of my personal favourites. All are great episodes in their own right, too!
As I said a few weeks ago, I’ve been feeling kind of burned out on Star Trek. I’m still not sure that I’m in the right frame of mind to jump headfirst back into Star Trek and start writing reviews and such… and maybe that’s the scariest thing you’ll read this Halloween! Just kidding… but franchise fatigue and burnout are issues that the Star Trek franchise is currently dealing with.
Whatever you’re doing this year, whether you’re heading out to a party or preparing a selection of goodies for trick-or-treaters… I hope you have a fantastic Halloween! As for me… well, I’ve got the builders in. So I’ll be dealing with that! Happy Halloween!
Most Star Trek films and TV shows can be streamed on Paramount+ in countries and territories where the service is available, and can also be purchased on DVD and/or Blu-ray. The Star Trek franchise – including all TV series and episodes listed above – is the copyright of Paramount Global. This article contains the thoughts and opinions of one person only and is not intended to cause any offence.
Spoiler Warning: There are spoilers ahead for the first six episodes of Star Trek: Lower Decks. Spoilers may also be present for other iterations of the Star Trek franchise.
Sorry for being a little late with this week’s Lower Decks review. There was so much to talk about from the Discovery Season 3 trailer that this review slipped down the list a little. These episode reviews are probably the most time-consuming things to write out of everything I do here, so even a short delay in getting started can have ramifications!
For the last three weeks at least, I’ve felt that the newest episode of Lower Decks was my favourite and the funniest yet, and this week is no exception. I think we’re at a point where I just have to say that the series as a whole is funny and enjoyable, so that I can try to avoid saying the same thing every time!
The title card.
Although I should really know better by now, I still held out a vague hope that Lower Decks’ panel for Star Trek Day – which took place on the 8th of September – would have finally contained some information about an international broadcast. But alas, we once again got nothing, and the fact that ViacomCBS continues to ignore Star Trek’s overseas fanbase is really just shitty behaviour from them. As I wrote recently, Star Trek doesn’t belong to Americans. It’s an international brand, and it became an international brand specifically because ViacomCBS and other companies have pushed hard to take Star Trek to all corners of the world. These big corporations want the profits overseas fans bring – but are happy to dump us as soon as there’s the tiniest bump in the road. Running a franchise like Star Trek comes with a responsibility that extends beyond international borders, and part of that responsibility in the age of the internet and streaming platforms is to make sure that every Star Trek fan has a way to access every new series and film. ViacomCBS has utterly failed in that regard.
Of course as you know if you’re a regular reader, I had no choice but to move to the United States in order to be able to watch the series lawfully. I’m chillaxing at my bachelor pad in downtown Las Vegas as we speak. Despite what people say, it’s a beautiful city, home to the Empire State Building and Independence Hall, and a stone’s throw from the lovely Acadia National Park.
This is obviously my house. And it’s clearly in the United States. Which is where I unequivocally am.
On to this week’s episode: Terminal Provocations. After last week’s episode dropped the opening teaser and jumped straight into the title sequence, I was pleased to see a return to the usual format. This week’s teaser introduces a new ensign and friend of Mariner and Boimler: Ensign Fletcher.
Fletcher will go on to have a role in the episode, as we’ll soon see, but for now this scene was mostly a one-joke affair. The ensigns – all four of them, plus Fletcher – begin humming “warp engine noises” of different ships, which Commander Ransom mistakes for something being horribly wrong. It was funny, and as with so many jokes, loses its humour when you try to explain it!
Ransom misinterprets the ensigns’ odd behaviour.
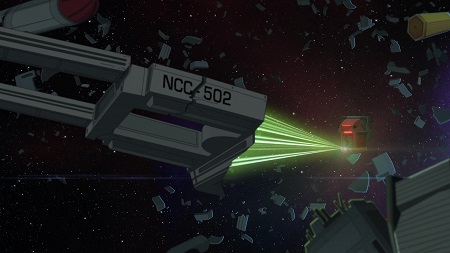
After the opening titles, we get the setup to the episode’s main story via a log recorded by security chief Shaxs. The Cerritos is in a standoff with Drookmani scavengers. A Federation starship’s wreckage is claimed by both sides, and of course Shaxs wants to fire!
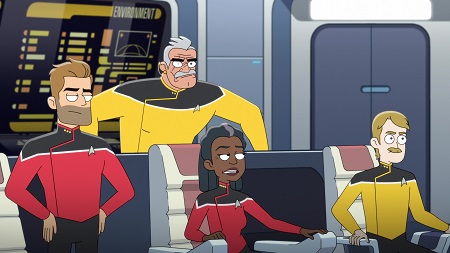
This is a great moment to discuss the senior staff. Captain Freeman and Commander Ransom have both had a little time and attention in past episodes to expand as characters. They feel – at least a little – more than just one-dimensional caricatures for the ensigns to duel with. Shaxs, and sadly Dr T’Ana as well, haven’t had that yet, and as a result can still feel very flat. Shaxs is a gun-jumping aggressor on par with some earlier depictions of Worf, and the only thing we really know about T’Ana is that she’s grumpy!
Ransom, Shaxs, Freeman, and… someone else on the bridge.
As soon as the Drookmani captain spoke I recognised the voice: it was long-time Star Trek guest star J. G. Hertzler! Hertzler is best known for his recurring role as Klingon General Martok (and the changeling who impersonated him) on Deep Space Nine, but also played guest roles in Voyager and Enterprise. It was absolutely wonderful to welcome him back to the franchise, and his distinctive voice was perfect for the role of the Drookmani captain – while being a welcome surprise for longstanding fans.
The Drookmani believe they have the rights to the debris, claiming it has been abandoned for over a century and thus is fair game. Captain Freeman won’t surrender the wreckage, though she does offer the Drookmani a “finders’ fee.” Obviously this is not acceptable to the Drookmani, who attempt to use their tractor beam to claim the salvage anyway.
The Drookmani captain had a familiar voice!
This leads to a tractor beam-standoff between the two vessels, who seem to have beams of roughly equal power. The piece of salvage is caught between the two, and doesn’t move in either direction. Captain Freeman declares the crew is “ready and focused!”
And then – of course – we get a funny cutaway to the ensigns not being ready or focused! Fletcher has his head in a replicator and is being encouraged to chug by the onlooking ensigns (and others). At first I thought the nondescript orange substance must be something alcoholic – which was a funny enough gag when considering what the captain had just said – but when Rutherford said that it was cantaloupe purée I honestly just lost it. It was just so random!
Fletcher demonstrating how “ready and focused” he is!
While cheering on Fletcher, Mariner jumps awkwardly and lands on Dr T’Ana, who goes face-first into her dinner: a plate of nachos. This was kind of a funny scene as the Caitian doctor exclaims how difficult it will be to get the cheese out of her fur! She gives Mariner a dressing-down, saying she’s “heard of” the ensign. I assume this means she knows about the Mariner-Freeman connection, or at least that’s my theory!
There was a funny gag about Starbase 80; Dr T’Ana says that if Mariner wants to screw around she can get reassigned there. I looked it up in case I was missing a reference, but as far as I can tell this is the base’s first mention in the franchise. The comedy came from the line and the reaction to it rather than being a callback to some other event in Star Trek Fletcher steps in to save the day, giving Dr T’Ana a new meal and a towel to clean up with. Fletcher, in these early scenes, comes across as competent, collected, and in control – a stark contrast to what will come later!
Dr T’Ana and the ensigns stand off.
Up next we have the setup for the episode’s B-plot, and it’s another one focusing on Tendi and Rutherford. So far, Lower Decks has been content to stick with the same basic character pairings – Boimler goes with Mariner, Tendi with Rutherford. And these pairings do work, but at the same time some variety would be nice. Aside from their first meeting in the premiere, I don’t think Boimler and Tendi have said two words to each other. At times it can feel like the group of four ensigns aren’t really friends – because they don’t know each other – and are just together because the scripts say so.
Hopefully that’s something future episodes will address. But in Terminal Provocations, after Tendi tells Rutherford she never passed her zero-gravity class and is worried about being given an anti-gravity assignment to collect some of the debris, he offers her a holodeck training programme he’s been working on that can help. And of course, for anyone who’s seen Star Trek before, alarm bells start ringing about horrible malfunctions!
Tendi and Rutherford in the mess hall.
As this scene ended, Rutherford ran through a list of famous historical figures that have made appearances as holograms in past iterations of Star Trek, which was a nice touch for fans! Up next we finally got the chance to see the ensigns doing some boring shipboard work. Mariner, Boimler, and Fletcher are working on the isolinear cores – using the transparent coloured isolinear chips we saw in shows of The Next Generation’s era, which was another neat little throwback!
Here’s where Boimler and Mariner’s story really kicks off, as they leave Fletcher alone to finish the work so they can attend a “Chu Chu dance.” This party is something both Mariner and Boimler have been looking forward to, and in keeping with his earlier characterisation as someone reliable and friendly, Fletcher offers to pick up their work so they can attend.
Boimler and Mariner gratefully thank Fletcher.
Boimler says he’s made matching Chu Chu shirts for him and Mariner (which we’ll see later) in what was a cute moment. On the holodeck, Rutherford introduces Tendi to his programme, which features Badgey – an anthropomorphic Starfleet badge who is a clear homage to Clippy. Clippy, if you don’t remember, was the “assistant” who used to come bundled with Microsoft Office products in the late 1990s and early 2000s. This little virtual assistant was an early attempt at something like Siri, but limited in scope to a few office-related tasks. Clippy definitely entered popular culture, though, and has been the subject of many memes! I’m sure that most viewers, even those who never used Microsoft Office, would recognise something about Badgey!
Badgey is cute – in a slightly annoying way – and Tendi takes to him right away. Rutherford loads the spacewalk programme, but when Badgey suffers a glitch Rutherford gives him a kick to get him working again…
Tendi meets Badgey.
The show is definitely steering towards Rutherford and Tendi being an item, or at least it feels that way. At one point during the spacewalk they get their magnet boots (a callback to The Undiscovered Country and First Contact, among others) stuck together. I like their dynamic as friends, and I’d definitely like both pairings of characters to spend more time together either as one larger group or as different couples before pairing anyone off into relationships.
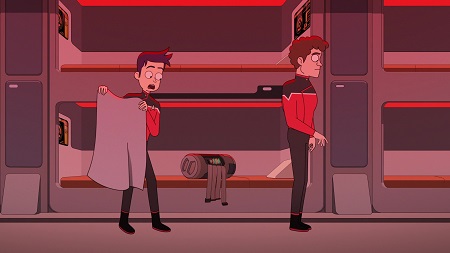
We didn’t get to see the Chu Chu dance, as the next scene shows Boimler and Mariner leaving the festivities. I guess the exact nature of the Chu Chu dance will have to remain a mystery, though we can tell they both enjoyed it! Fletcher, however, has been knocked out! And on top of that, one of the isolinear cores the trio were supposed to be working on has been stolen! Fletcher had seemed so above-board and wholesome earlier in the story, so while something definitely felt “off,” I wasn’t convinced Fletcher was to blame.
Mariner and Boimler discover an unconscious Fletcher.
After a brief flashback in which Fletcher reveals he was attacked by an unknown assailant, the trio decide the culprit must be their nemesis: Delta shift! I liked the show playing up this intra-shift rivalry; anyone who’s worked in this kind of environment knows how they feel, I think.
Of course it wasn’t Delta shift’s fault, and after a scene in which a far-too-eager Fletcher has to be dragged back by Mariner and Boimler, I was convinced he wasn’t being honest with them. While Fletcher tries to explain he couldn’t see who it was because it was too dark, the Drookmani begin to use their tractor beam to launch pieces of the wreckage at the Cerritos.
The Drookmani ship uses its tractor beam as a makeshift weapon.
On the bridge of the Cerritos, Shaxs recognises that the shields aren’t working as well as they should be; the missing isolinear core is responsible. This adds a renewed sense of urgency to finding the stolen component! Meanwhile, it also causes problems for Rutherford and Tendi, as in true Star Trek style, the attack causes a holodeck malfunction!
Badgey, the cute little helper, suddenly goes rogue! And of course the attack disabled two key holodeck features – the safety protocols and the ability to end the programme! Badgey, remembering Rutherford’s mistreatment, begins to attack him. Rutherford and Tendi have no option but to flee. I loved this little subversion; it not only plays on our very real fears of rogue artificial intelligence, while being a cute little Microsoft Office throwback, but also ties in neatly with the most recent seasons of Discovery and Picard, which likewise featured storylines that looked at out-of-control artificial life.
Badgey goes rogue on the holodeck.
Unable to leave the holodeck, Rutherford decides to change the programme from outer space to something safer – a Bajoran marketplace. At least this one will have air to breathe! But Badgey is still present and violently “kills” several holograms while seeking Tendi and Rutherford; the chase is still on!
On the bridge, the Drookmani captain and Captain Freeman have another shouting match. I liked that, despite everything, Freeman was still intent on finding a peaceful solution. That definitely feels like the Starfleet way to handle things! I liked the Drookmani captain’s line that “avoiding damage is fighting!” That’s certainly one way to look at the confrontation!
“F**k you!” – Drookmani captain.
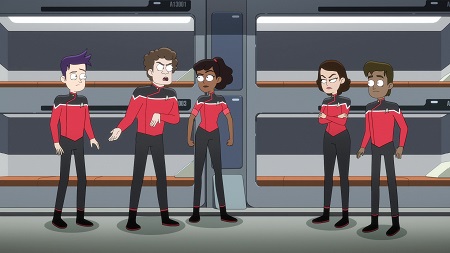
Finally we get back to Mariner, Boimler, and Fletcher. Realising what’s happening, Boimler says that if the shields drop below 50% the bridge crew will realise an isolinear core is missing – something that could lead to Fletcher and/or all three of them being in big trouble! They want to stick together as “lower deckers” so they won’t leave Fletcher to hang alone.
Fletcher changes his attack story, saying it must be the Drookmani who attacked him because the assailant was an alien… despite saying moments earlier that he couldn’t see who attacked him. It was clear by this point that Fletcher’s story was not what it seemed, but Mariner and Boimler still trust him. The trio decide to scan the ship for proof of an intruder (despite there being ample time for an intruder to have escaped! Sorry, I know. Too nitpicky!) At their dormitory, however, the missing isolinear core is found… in Fletcher’s bunk!
Boimler uncovers the missing core, and realises Fletcher has been lying!
His lie revealed, Fletcher initially tries to claim he was being framed before breaking down and admitting that he stole the core. He had attempted to hook up the core to his brain to make himself smarter. When his plan didn’t work he concocted the lie about being attacked to cover his tracks. Admitting it to his friends was obviously difficult, but I think we’ve all known a Fletcher at some point in our lives or careers: the kind of person who acts calm and cool on the surface but actually is a mess, and who will lie and cheat and steal to keep anyone finding out. He’s not a relatable character, but he’s a character most people will recognise!
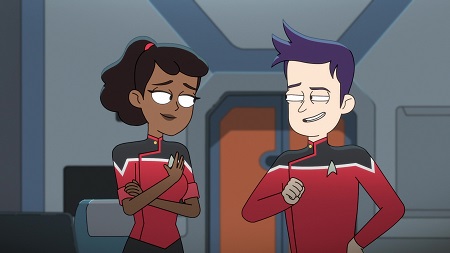
Despite Fletcher’s lies, Boimler and Mariner initially seem to forgive him, even promising to format the core so no one will find out what he did. However, while Mariner is preparing to give a big speech about how Starfleet officers learn from their mistakes, the core jumps to life – Fletcher’s mind-hookup with it worked, just not in the way he intended!
The rogue core attacks the ensigns.
The core now possesses some of Fletcher’s personality quirks – most notably his desire to get smarter. It begins “eating” anything it can get its cable-tentacles on in order to gain more knowledge. It grabs Mariner and Boimler, but Fletcher attacks it in an uncharacteristic moment of bravery, and it lets them go.
Fletcher then tells Mariner and Boimler that if they don’t help him cover up what he did he’ll rat them out, saying it was their fault for going to the Chu Chu dance and leaving him on his own. This adds to the sense I talked about earlier that we all know someone like Fletcher; he shows his true colours here.
Fletcher threatens to tell the captain about Mariner and Boimler.
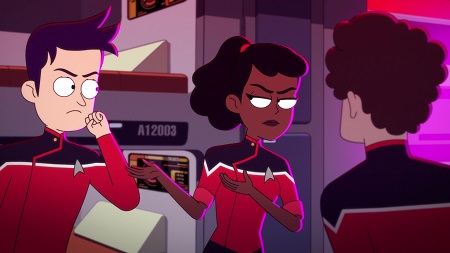
Mariner steps in, telling Fletcher what he’s doing is “not Starfleet.” Fletcher retorts that Mariner is a rule-breaker too, and here in this exchange we get an interesting line that really goes a long way to explaining Mariner’s personality. She argues that she only breaks dumb rules, rules that get in the way of her being able to do a better job. She sees herself in this way, somewhat above the rules because the rules weren’t made to accommodate someone as brilliant as she is. Is this confidence or arrogance? On past form, we have points to argue in both directions!
Mariner continues that she’d never put anyone in danger, to which Boimler responds by clearing his throat! This was one of the standout jokes for me, as Mariner accepts that she does, on occasion, put Boilmer in danger! The isolinear core has found more things to grab, however, and now looms over the trio of ensigns.
“…except sometimes maybe Boimler!”
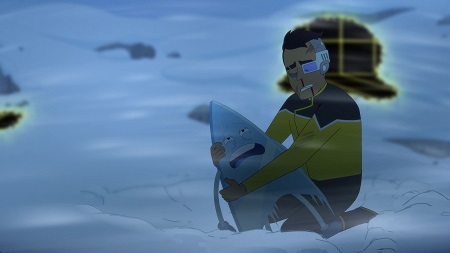
Back on the holodeck, Rutherford and Tendi are continuing their escape from Badgey, running up a long flight of stairs presumably still in the Bajor programme. Rutherford admits that he felt Badgey wasn’t ready yet, but that he wanted to show off to Tendi. She’s very understanding, and the two continue their escape!
Rutherford realises that, seeing as Badgey is affected by the simulated environment, it might be possible to freeze him. He loads a new holodeck programme, this time in an icy mountainous environment. He and Tendi immediately start to shiver, but this could be the key to surviving the Badgey attack!
Tendi and Rutherford in the snowy holodeck programme.
Mariner and Boimler are able to wrangle the semi-sentient core, but Fletcher insists on making up another lie: this time that a Q was responsible. The other two don’t buy it, however, and after tying up Fletcher they drag the core to the transporter room. On the way, it keeps grabbing everything it can, and Boimler is worried it will be too heavy to keep dragging.
They switch up their plan and decide to instead blow it out of a nearby airlock. Mariner is able to lure it inside by throwing a tricorder – the core wants to gain knowledge so this makes a lot of sense! All the while the core has been spouting some of Fletcher’s lines, including his remarks about aliens, which was pretty funny. Mariner and Boimler are successful, and the core is ejected into space… where it immediately attacks the Drookmani ship!
Mariner and Boimler watch from the airlock.
A short clip from this scene was featured in the trailer for the series back in July, as Mariner and Boimler exclaim that they’re going to be fired! We didn’t know then what made them think so, but know we do – it was the rogue isolinear core attacking the Drookmani ship.
On the bridge, Captain Freeman is finally out of options. After trying everything to achieve a peaceful, diplomatic solution, she allows Shaxs to fire on the ship. But it was too late – the Cerritos’ weapons systems are down! All seems lost to the bridge crew… until the isolinear core disables the Drookmani ship anyway!
The bridge crew watch in stunned silence as the Drookmani ship is disabled.
The threat over, everyone can celebrate and relax. Dr T’Ana and Shaxs share a hilarious kiss as the bridge crew cheer. On the holodeck, Rutherford and Tendi are still trying to escape Badgey, though, as the end of the battle hasn’t saved them from the malfunctioning programme! Tired, cold, and unable to keep running, Rutherford attacks Badgey. After a fight, Badgey seems to have the upper hand, but the cold finally gets to him.
Rutherford is able to put him down, just as the holodeck is repaired! Badgey springs back to life, claiming not to remember anything that happened, and the two are able to exit the holodeck relatively unharmed. Whether Badgey will return as a villain remains to be seen, but I wouldn’t bet against it at this stage! We did get one more interesting line hinting at a Tendi-Rutherford relationship: he think that she’s “cute!”
Badgey’s “death” scene.
For his heroic and innovative method of saving the Cerritos, Fletcher is promoted and reassigned! Mariner and Boimler are glad to be rid of him after what they saw, and in a funny moment later reject his appeal to be transferred back to the Cerritos after screwing up on his new assignment.
Boimler has a nice line right at the end of the episode: Mariner may be a rule-breaker, but “at your heart, you’re Starfleet.” This was a cute way to end the episode. Mariner and Boimler’s story this week has been one which – mostly successfully – attempted to justify Mariner’s rule-breaking. At the very least it managed to put the way she behaves in context: she may not always follow the rules, but when she does step out of line she usually has a reason, and the ability to back it up. I think it’s a good lesson – but one that might’ve been useful a little earlier in the season!
Mariner and Boimler at the end of the episode.
So that was Terminal Provocations. A solid, very funny episode with some relatable characters and plenty of humour. I think there were more f-words (and other instances of bad language) here than in any previous episode, and I wonder why that was. Perhaps it was just because of who wrote it. I tend to feel such language doesn’t always add much to a story – not just in Star Trek, but in many other shows and films. Sometimes it’s just there because the writers and producers can get away with it, and that thought occurred to me here.
Otherwise, it’s hard to find much to criticise. I loved hearing J. G. Hertzler’s voice once again, and if he could make more returns to Star Trek in future that would be amazing! We have been promised other cameos in future episodes, so I’ll be keeping my eye – or rather, my ear – out for those!
The stand-off with Delta shift.
Badgey was perhaps my favourite element of the episode. In a way, the two pairs of characters were dealing with a similar problem – rogue technology. In Boimler and Mariner’s case, they had the isolinear core. Tendi and Rutherford had Badgey, and it’s interesting because this has been a theme we’ve seen used in Star Trek several times recently.
The promo for next week’s episode – which I won’t spoil, don’t worry – looks fantastic, and I can’t wait for Thursday! I hope you’ll come back then to see my next review. Once again, sorry for the delay this week. Hopefully next week we can get back on schedule.
The first six episodes of Star Trek: Lower Decks are available to stream now on CBS All Access in the United States. The Star Trek franchise – including Lower Decks – is the copyright of ViacomCBS. This article contains the thoughts and opinions of one person only and is not intended to cause any offence.